Installation on a shared hosting
In this article I will tell you how to install the Rukovoditel on the virtual hosting with control panel cPanel. On different control panels the installation will differ in detail, but in general the installation procedure is the same and consists of the following steps:
- Upload the archive to a folder on the server and unzip it.
- Create a database and user for the database.
- Run installation.
First download the Rukovoditel archive.
The second step is upload Rukovoditel in the root folder of the sever. This can be done in two ways: using the File Manager in the control panel and via FTP. To unpack the archive you can in cPanel only, so consider this method:
- Go to the hosting control panel.
- Go to File Manager.
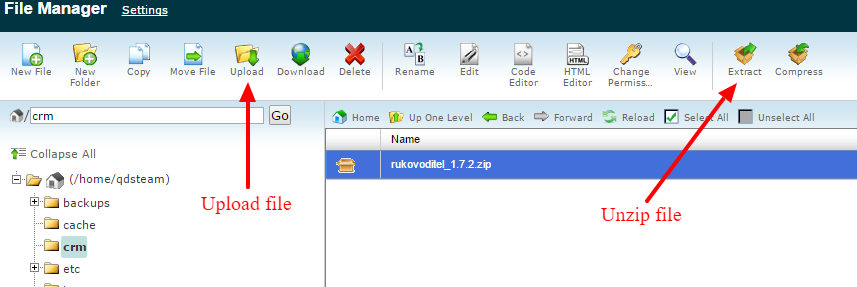
- Navigate to the root folder of the site, in our case it’s “/home/mycompany/public_html/”. Go to the folder by clicking on it 2 times. If necessary, create an additional folder in which you installed the Rukovoditel, e.g. “crm” and navigate to this folder.
- Click on “Upload” in the top menu.
- After the upload is complete select the archive by clicking on it and click “Extract” in the top menu.

The next step is creating a database:
- Go to “MySQL Databases”
- Enter the database name and click “Create database”. Perhaps on your control panel create a database and user occurs in a single step, then the following steps are not needed.

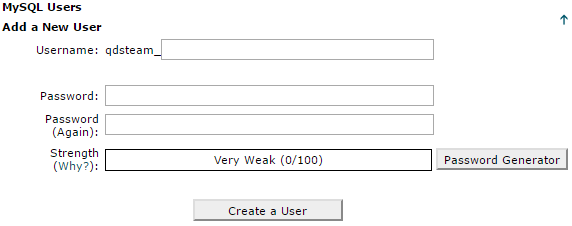
- On the same page, create a user for the database.

- And the final step — add the user to the database. On this page locate the section “Add user to a database” and select from the list of created user and database.

The database is now created and you can proceed to the standard setup wizard of Rukovoditel. To do this, enter in the browser the path to the folder to which you uploaded files, for example: http://mycompany.com/crm/
You should see the installer.

Select language. The next step is to check the environment.

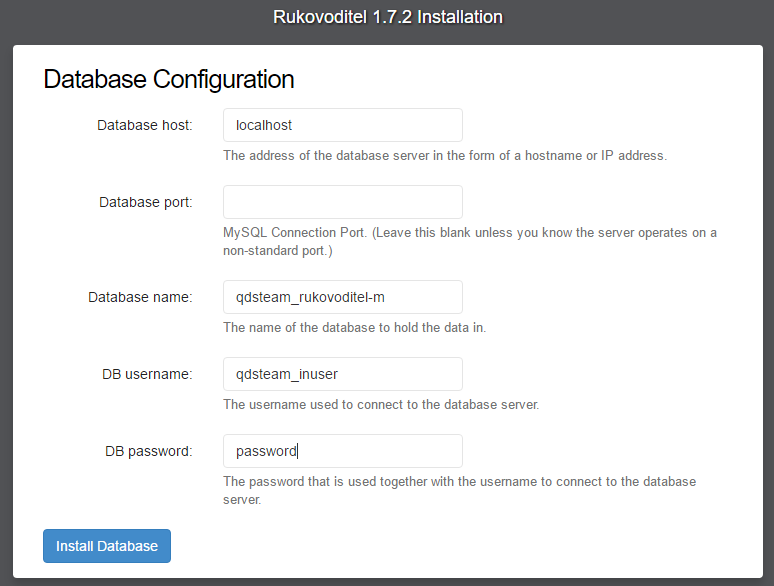
On the page Database Configuration enter the parameters for a previously created database.

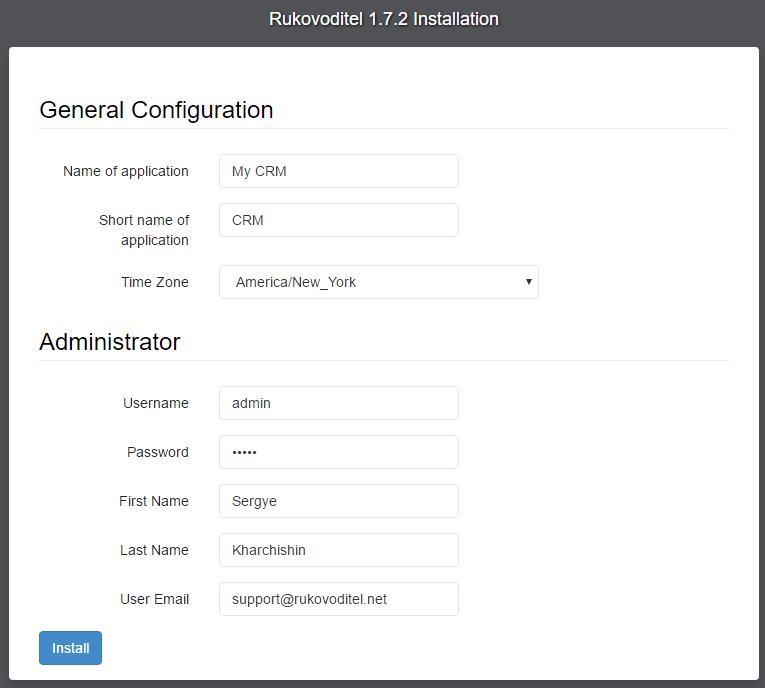
After installing the database, complete the basic settings for the system.

And click on the Install button.

Upon completion of the installation, delete the zip file, which you downloaded in the beginning, and remove the /install/ folder.